Stitching Photos
Why should we bother stitching photos? Why don’t we take a wide-angle lens and shoot showing the entire area? Both photos would cover the location edge to edge? The reason is focal length. Wide-angle lens gives the area a ‘far away’ look and distorts the location – nothing wrong with this if that is desired. Stitching allows the photographer to show the location in wide grandness but without the wide-angle feel. All is not perfect; here is a list of issues.
Disadvantages to stitching:
- Stitching results in panorama – “letterbox” rectangle photos which do not fill the screen.
- The file size is large as several photos are put into one. Expect 1.5 GB files if shooting RAW.
- Requires tripod, head etc.
I will describe the way I stitch, a process I have evolved over the years but there are several equally effective ways of make an omelette.
Required tools:
- Camera with manual control: Shooting with automatic cameras or on automatic exposure modes will generally fail.
- 35mm or 50mm lens. These focal lenses work the best for me. Wider than 35 does not work as the distortion on the photos is too much for stitching software and can fail. Tighter than 50mm works against the purpose of panorama.
- Sturdy tripod, you may do long exposures and wind may cause shake the camera
- Head that allows vertical shooting. Ex. Shooting vertically allows the image to have better height. With horizontal (normal) camera the height of the end picture becomes small. You can use L bracket or ballhead which allows camera to mount vertically

- 2 axis bubble level. You can mount it on hot shoe. A single bubble will also work but will take you longer to level the camera. You can also use the horizon feature provided in many cameras.
- Flash light to check level etc if shooting in low light.
- Software: Bridge. Photoshop CC. A combination of these two software work perfectly for me.
Optional tools:
- Remote shutter release to eliminate any shake when pressing the shutter.
- Icebox with beer. [Recommended]
- Partner to hold the beer while you do the settings.
Settings:
- You will have to set the exposure yourself. Point the camera to the area of the scene you want exposed perfectly and set the exposure.
- Since the camera is on a tripod, try to use the lowest possible ISO for best IQ.
- You will generally want good depth of field and set the aperture to f16.
- Shutter speed will depend upon the light. If you feel the shutter will cause unwanted motion blur due to movement of cars, grass etc., then increase the ISO to get the desired shutter.
- Set appropriate white balance. Do not keep in auto. Quick Tip: If shooting during slanting light keep at 5000. Remember if you shoot in RAW you can change later in PS.
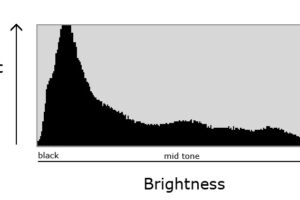
- Live view: Turn on live view and histogram.
- Focus: Put the lens on manual focus. If auto, the focus will shift from shot to shot ruining the stitch. Learn to use hyper focal distance to your advantage. Quick tip: On 50mm at f16 9ft to infinity will be in focus. So you can safely set the lens to 9 ft. and all will be sharp. If this confuses you, just set focus on what you think is the main interest in the photo.
- IS off: When on tripod IS is off.
- Filters: Polarizing filter will not work but you can use a graduated filter if align it carefully through the entire scene. You can add ND filters. Pola’s do not work because they darken sky depending upon angle to sun.
Shooting Procedure:
- Pick the best spot for the photo and set the tripod on firm ground. Adjust height.
- Mount the camera horizontally with all the above settings in place.
- Mark the first and last frame.
- Level the camera. Checking just in one position is not enough, pan the camera from one end to another and ensure it is perfectly level at all positions.
- Make final exposure check, doing the above will take you time and if shooting in fading light the exposure might have changed.
- Take the first shot, pan camera to leave around 25% overlap with the previous photo. Complete the entire pan in this manner as quickly as you can. Delays may cause light change.
Eggs are now half cooked, lets finish the omelette.
Post Procedure:
- Use Bridge and open the CR2 files in Camera Raw.
- Click on the most important frame and then select all images.
- Make all your color correction, profile etc. adjustment to the key photo and it will apply to the rest of the photos. (This is why all frames where selected above.) Open all photos in PS. Save all the photos ensuring the sequence of photos is correct. Note: These files must not be smart objects.
- Go to File – Automate – Photomerge.
Click on Auto and select “Blend Images Together”.
And then click Add open files. Enter! You may find some ‘cracks’ in the finished photo, but it will go away as PS refreshes.
Recommended Further Reading:
Please post questions/problems you come across and share what you shoot.
Happy Shooting!
For further reading:


Most Commented Posts